This article is on how to install and run Lisk delegate node on testnet, on Digitalocean Ubuntu 16.04 droplet. It should help you to set up a new delegate node as easy as possible while still being secure and stable.
Before starting I assume you are already familiar with basic terminal commands and how to access a remote server via SSH.
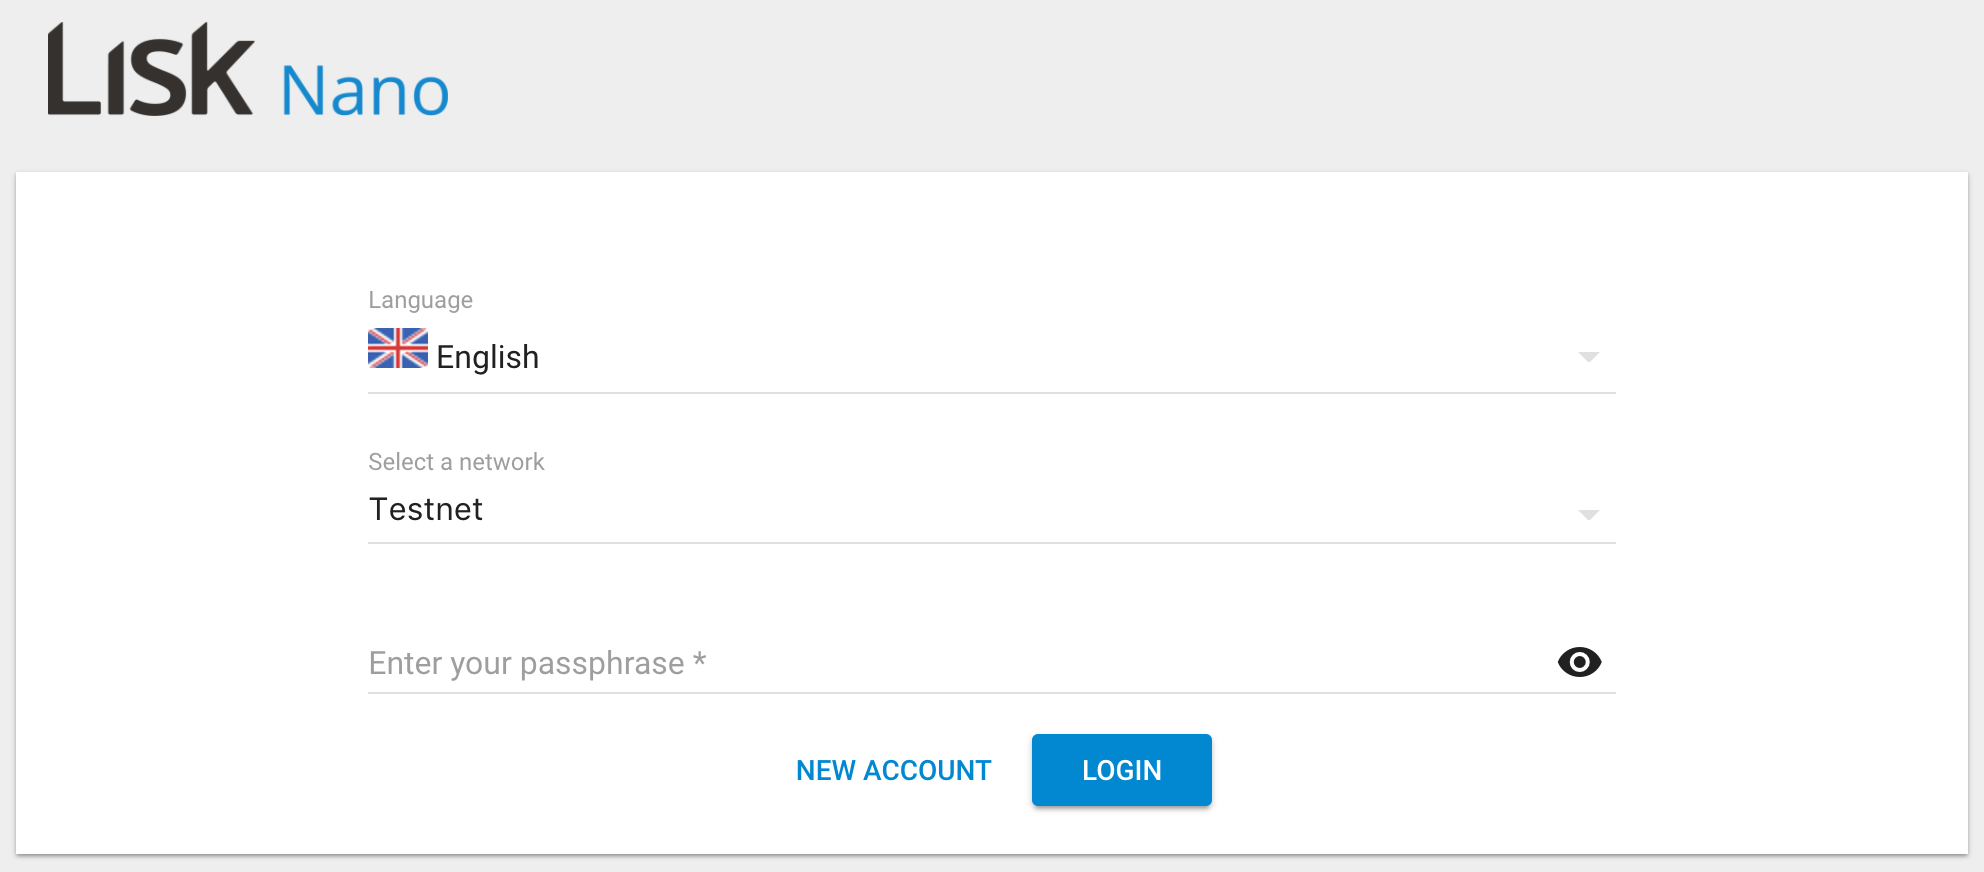
Create a test account
Use Lisk Nano to create an account on testnet and register it as delegate. You'll need some test Lisk to register as delegate (the delegate registration costs 25 LSK). I asked on lisk.chat for some test Lisk (thanks @lisksnake).
Create a droplet (server node)
For this tutorial, a 4GB - 2vCPUs - 80GB SSD - 16.04.3 x64 droplet is used.
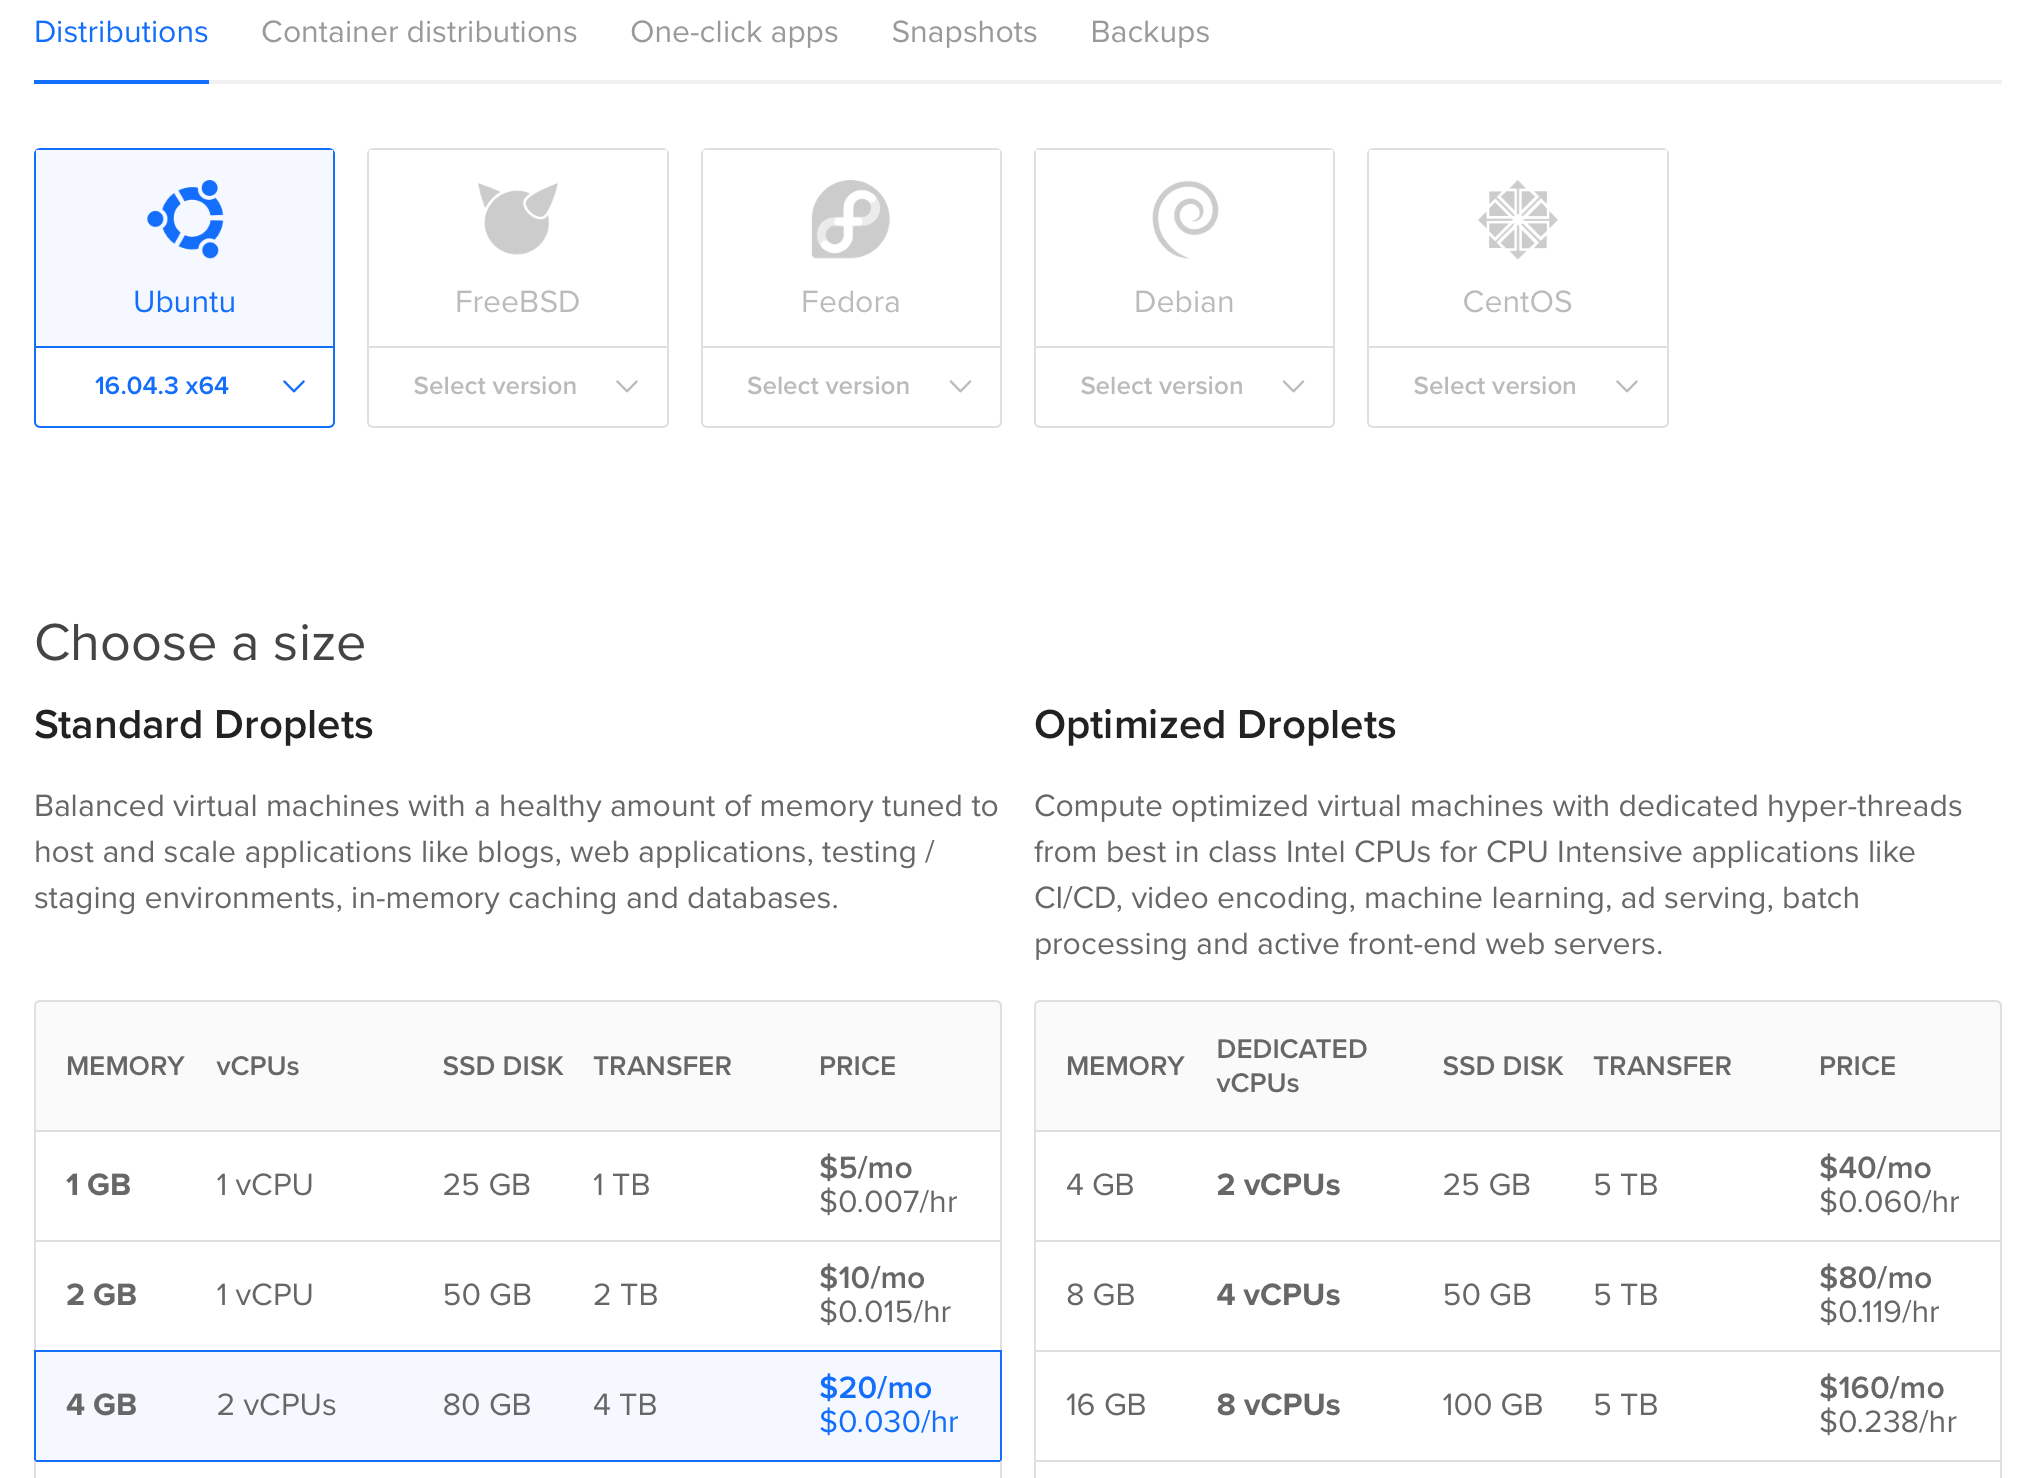
If you've never created a droplet before, follow this guide. You can choose a different configuration but be advised I found 2GB of RAM is the minimum when installing Lisk from source (otherwise npm install won't work correctly).
Once you've created the droplet, you will receive an email from digitalocean containing the IP address and the root password required to access the droplet:
ssh root@123.456.789.012
There is a very good tutorial on how to do Initial Setup with Ubuntu 16.04, describing each step in detail, I'll focus on what commands you need to execute (in the given order) to setup a delegate node and start forging.
Create a new user and add the user to the sudo group
On the server
adduser sdrpa
usermod -aG sudo sdrpa
su - sdrpa
Disable Password Authentication and Root Login
Create ~/.ssh/authorized_keys file on the server and paste local machine public key to ~/.ssh/authorized_keys file. (If you've never created SSH keys follow this guide to create the RSA key pair):
mkdir ~/.ssh
chmod 700 ~/.ssh
nano ~/.ssh/authorized_keys
# paste content of ~/.ssh/id_rsa.pub from your local machine and save the file
chmod 600 ~/.ssh/authorized_keys
sudo nano /etc/ssh/sshd_config
In /etc/ssh/sshd_config, set:
PasswordAuthentication no
PermitRootLogin no
Reload the SSH daemon and exit
sudo systemctl reload sshd
exit
Now you should be able to login to the remote server without a password
$ ssh sdrpa@123.456.789.012

Welcome to Ubuntu 16.04.3 LTS (GNU/Linux 4.4.0-112-generic x86_64)
...
Update all packages
sudo apt-get update && sudo apt-get dist-upgrade
Set up ufw firewall and install fail2ban
sudo ufw allow OpenSSH
sudo ufw allow 7000
sudo ufw enable
sudo apt-get install fail2ban
Install ntp
sudo apt-get install ntp
sudo ufw allow ntp
sudo service ntp stop
sudo apt-get install ntpdate
sudo ntpdate pool.ntp.org
sudo service ntp start
Install Lisk
wget https://downloads.lisk.io/lisk/test/installLisk.sh
cd lisk-test
chmod +x installLisk.sh
./installLisk.sh install
You'll be asked several questions, choose default location, testnet and when asked if you want to synchronize with genesis account answer no.
chmod +x lisk.sh
./lisk.sh stop
Edit ~/list-test/config.json to enable forging
Replace secret with your passphrase (passphrase for the testnet account you've created before)
...
"forging": {
        "force": false,
        "secret": ["first second third fourth fifth sixth seventh eighth ninth tenth eleventh twelfth"],
        "access": {
            "whiteList": [
                "127.0.0.1"
            ]
        }
    },
...
Rebuild with the latest Lisk blockchain snapshot
./lisk.sh rebuild -u https://testnet-snapshot.lisknode.io -f blockchain.db.gz
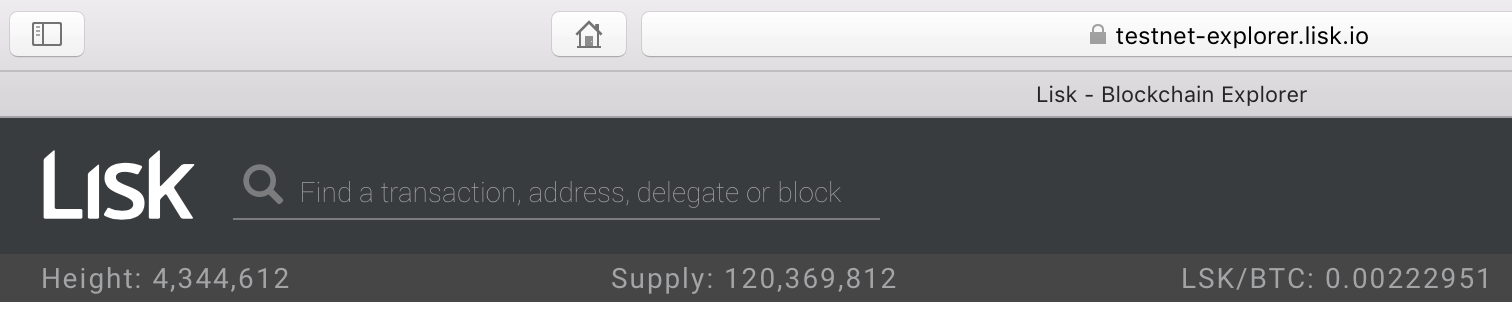
Visit testnet explorer to check the current block height
Wait some time for your node to be fully synchronized with testnet.
You can check your node current height with:
./lisk.sh status

# output:
√ Lisk is running as PID: 7369
Current Block Height:  4344100
Once your node is in sync with testnet, the forging will be activated. Check it with:
grep Forging logs/lisk.log

# output:
[inf] 2018-01-31 13:41:34 | Forging enabled on account: 5055500162731337929L
That's it.
I advise you to check Best practices for hardening a new sever for further information regarding the server security, but at this point, you have a solid foundation for your delegate node.
Notes
I skipped enabling swap space on the server. According to Digitalocean recommendation:
"Although swap is generally recommended for systems utilizing traditional spinning hard drives, using swap with SSDs can cause issues with hardware degradation over time. Due to this consideration, we do not recommend enabling swap on DigitalOcean or any other provider that utilizes SSD storage...If you need to improve the performance of your server on DigitalOcean, we recommend upgrading your Droplet...".
Resources
Initial server setup with Ubuntu 16.04, Digitalocean
How To Use SSH Keys with DigitalOcean Droplets
How to add swap space on Ubuntu 16.04
Lisk GitHub, LiskHQ
Lisk Documentation, LiskHQ
How to setup a Lisk node (on testnet and mainnet), KyleFromOhio